Zoom 101 – Tutorial
**important note: Currently you can only host a webinar for 40 minutes. That time starts when you log in to start your meeting (even if your only doing prep for more info click here).
Setting up a Zoom call.
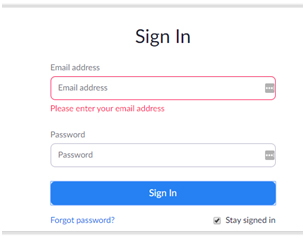
There are many ways to start a Zoom meeting. The most basic way to through a web browser. Go to http://zoom.us and log in.

Enter your TFK/GHAI email address and your ZOOM account password you created. If you don’t know it, contact HELPDESK and we’ll reset it for you.
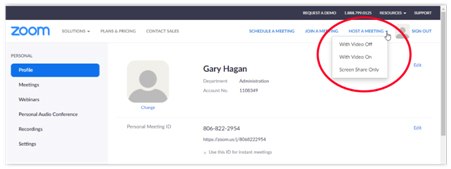
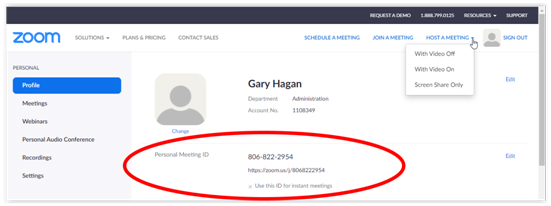
Once logged in you can start your meeting. Click on Host a Meeting at the top right of the window, and select with Video On or with Video Off.
If this is your first time using Zoom on your computer, you may be asked to download and run the Zoom application. Please do so.
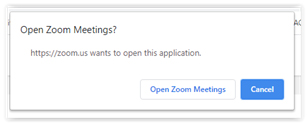
If asked to Open Zoom Meetings with an application, click Open Zoom Meetings
Zoom may ask you at some point for access to your computer’s camera and/or microphone. Access to the camera is optional unless you plan on using the videoconference feature. Access to the microphone will be required in order for you to talk during Zoom calls.
If you are going to join the call using your computer’s speaker/microphone / headset, click on the Computer Audio tab and then click on Join with Computer Audio.
If you are going to join the call yourself via telephone, call one of the phone numbers listed on the pop up window, enter in your meeting ID, and enter in your participant ID when asked.
Note: The phone numbers listed may be different than shown below, certainly the meeting ID will be.
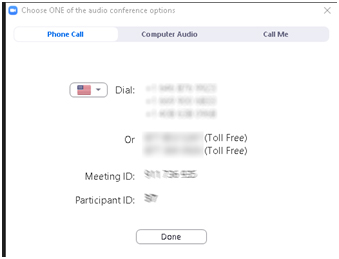
Then click DONE on the screen to start the meeting.
You can give out the meeting information anytime you want – usually before the meeting starts, but you can send it later during the meeting (for late invitees).
Your Personal Meeting ID will never change. You will use that for all Zoom conference calls that you start. You should copy and send the Personal Meeting link out beforehand to anyone you want to join the call. Copy and paste it into an email, a text message, a Facebook Messenger message, etc.
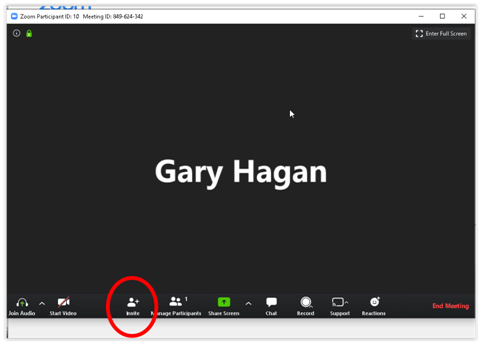
Once the call has started, you control the meeting through the dashboard:
You can share your screen (presumably to share a website or powerpoint file), invite others to join the call or End the Meeting.

You can add attendees to your meeting after you start it.
From the Meeting Screen, click on the Invite button. (Or from the Invite Others button on the previous screen.)
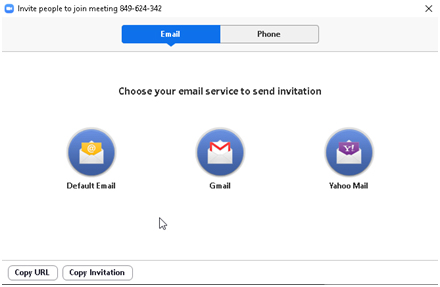
‘If you click on Invite or Invite Others you will then have the choice to send them an email (with all the call information automatically added), or have Zoom call them on their telephone (you would just need to enter their phone number.)
Then click on the Default Email button.
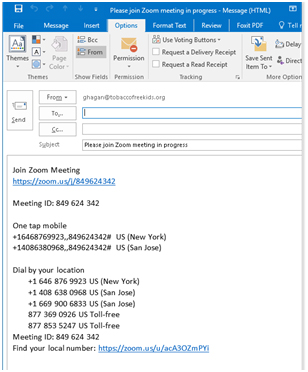
Outlook will open a new email and insert all the necessary meeting information into it.
All you need to do it pick your attendees and hit SEND.
If you click on the Phone button, just enter a person’s name and their telephone number, and the Zoom server will call them and place them in the conference.
You can schedule a meeting/call ahead of time.
From the main Zoom dashboard window, click on Schedule a Meeting at the top right.
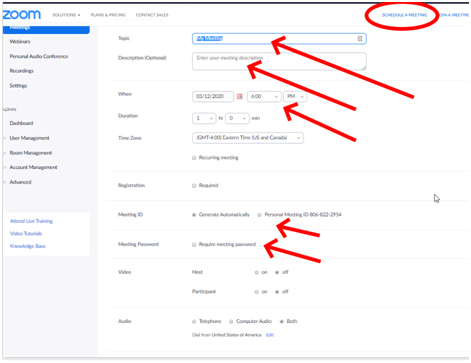
Here you can give your meeting a name, a description, the start time, whether you want to allow video or not, or whether you want to allow telephone call-ins or just computer audio for everyone, or both.
You can have a new, unique Meeting ID generated for the call for extra security, but it isn’t required. You can require attendees to enter in a passcode before they join (for extra security), but it isn’t required.
You can set the duration of the call, but you aren’t limited to it, the call won’t end after exactly one hour or whatever you set. That’s really just for scheduling information purposes for you and your callers.
Scroll down, and there are more options for your meeting:
You can allow callers to call in before you start the meeting, and you can have the meeting (audio and video) recorded. If selected before the meeting starts, you will be given the option to download the MP4/AVI file after the meeting ends.
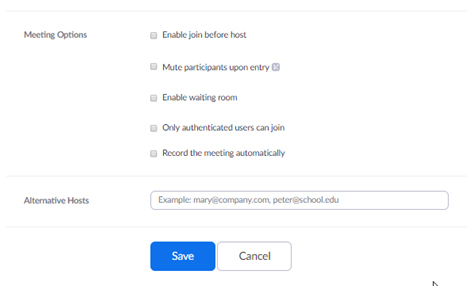
Click Save to save and schedule your meeting.
After you click Save, towards the top of the screen you will be given the option to add the meeting details to Outlook, a Google Calendar, or a Yahoo calendar. Click on the Outlook Calendar button.
Depending on your version of Outlook it will either add it directly into your calendar, or generate a .ics file (a generic calendar schedule file) that you can email to others, or double click on it yourself to add it to your own calendar.
To participate in a Zoom conference:
If you are invited to a Zoom conference call, you will probably receive an email with information like this:
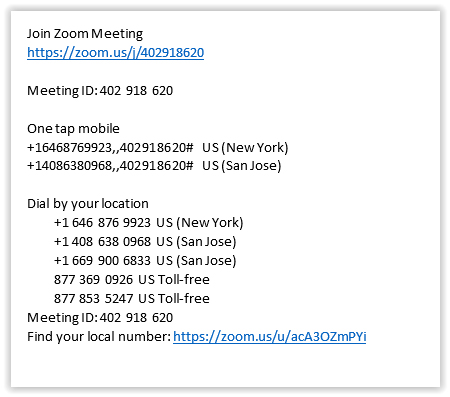
To join using your computer, click on the link at the top. It has the conference details encoded in it, so you will be joined to the right call.
If you are on your cell phone and get the email, you can click on one of the One Tap Mobile numbers and your cell phone will dial the conference and join you automatically.
If you just want to join by any phone, you can dial one of the Dial by your location numbers, then enter in the Meeting ID yourself when asked.
Other ways to use connect with Zoom conference calls:
You can use the Zoom app on your iPhone or Android phone. Go to the App or Play store, search for and install Zoom. The icon looks like this and is titled “ZOOM Cloud Meetings”

After it is installed, run it. The first time you run it, it will ask you to log in. After logging in, all the action buttons to start, end, and schedule your meetings, invite others and to start screensharing are there.
If you have Zoom on your phone, and click on one of the Zoom links from an invitation, then the Zoom app will run and connect you to the conference.